If you have two network cards or some other means of connecting to the internet and a network card in your ubuntu computer, it can be a very powerfull router. You can set up basic NAT, do port forwarding, set up a proxy, and even do packet prioritization so your downloads dont interfere with gaming! This howto will cover setting up Webmin which will be used to configure masquerading, DHCP, and DNS servers. It also lets you configure port forwarding. QoS (packet prioritization) will be covered in a later guide. This guide is made using kubuntu to show that it will work with any version of ubuntu.
Webmin
Webmin is a web based computer management tool. It is similar to the web interface that you get from routers you buy at stores, but allows you to control most of the computer.
To install webmin, you must first go to its website at www.webmin.com and download the latest version in the top right. Download the tar.gz version into your user folder.

Once the download is complete extract it to a folder for example \usr\webmin. I extracted it into my user folder in this tutorial because this is just a live CD so it doesn’t really matter. You may delete the tar.gz file after you extract it as it is no longer needed.

Before you install it you will want the package “libnet-ssleay-perl”. So open the terminal and run “sudo apt-get install libnet-ssleay-perl”. Now navigate to the directory the folder is (For me it would be “cd /home/ubuntu/webmin-1.280”) and then run the command “sudo sh setup.sh”.
Config file directory [/etc/webmin]:
# Leave as default, or change as you wish
Log file directory [/var/webmin]:
# Leave as default, or change as you wish
Full path to perl (default /usr/bin/perl):
# Leave as default, or change as you wish
Web server port (default 10000):
# Leave as default or change it to what ever port you want.
Login name (default admin):
# Leave as default, or change as you wish
Login password:
# Choose a password, it will not display anything while you type
Password again:
# Self explanatory
Use SSL (y/n):
# Of course ‘y’
Start Webmin at boot time (y/n):
# Once agian… ‘y’
It will not finnish up the installation and you will be able to login by using localhost:port or routerip:port like http://localhost:10000

Masquerading
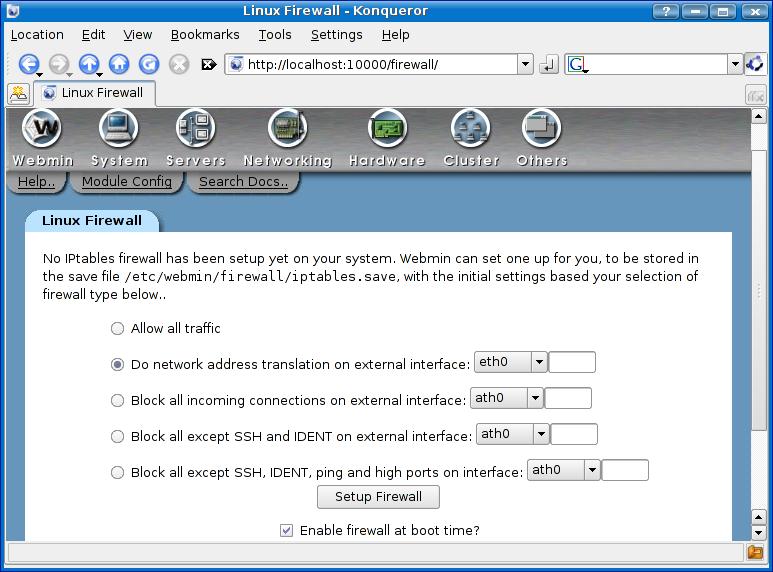
Masquerading is also known as NAT. To enable it, login to Webmin, go to the networking section, and click on firewall. It will ask you to configure it now. press “Do network address translation on external interface:” and choose the external interface (the one that is connected to the internet) and click on “Enable firewall at boot time?” then click on “Setup Firewall”.

Now you must add rules to your firewall to allow traffic coming from the internal network, loopback, and traffic related to an outgoing connection (so that you may recieve a response to your requests).
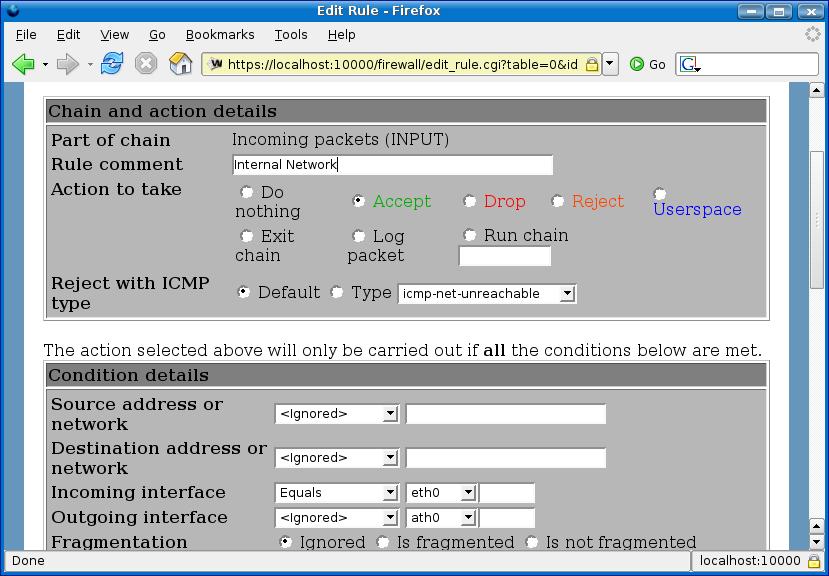
To allow traffic from the internal network, under “Incoming packets (INPUT)” press add rule. Give the rule a comment (name) like internal network and press the button by the “Accept” in green writing. Then down to “Incoming interface” put equals and put your internal interface, in the picture below it is eth0. Scroll down and press create.

Now do the same but put lo as incoming interface.
Now you must create another rule for existing connection. Put a comment and press accept. For incoming interface put equals and put your external interface (eth1 for me). Scroll down to “Connection States” and put equals and select both “Existing connection (ESTABLISHED)” and “Related to existing (RELATED)” and press create.

Now you must drop external connections that do not meet any of the other rules, so set the default action of “Incoming packets (INPUT)” to drop and press the button.
Scroll down to the bottom and press apply configuration.
Now go to the System section and click “Bootup and Shutdown”. Click “Create a new bootup and shutdown action”. Make the name “webmin-ipt” without quotes, make the description whatever you please, and for bootup commands, put “/bin/echo 1 > /proc/sys/net/ipv4/ip_forward” and make a new line and put “/sbin/iptables-restore /etc/webmin/firewall/iptables.save” then press create. Find the bootup command you just created in the list and click it then press Start Now.
Configure DHCP
In webmin, go to servers and press DHCP Server and click Module Config.
Replace (without quotes)
DHCP server config file with “/etc/dhcp3/dhcpd.conf”
DHCP server executable with “/usr/sbin/dhcpd3”
Command to start DHCP server with “/etc/init.d/dhcp3-server start”
Command to apply configuration with “/etc/init.d/dhcp3-server restart”
Command to stop DHCP server with “/etc/init.d/dhcp3-server stop”
Path to DHCP server PID file with “/var/run/dhcp3-server/dhcpd.pid”
DHCP server lease file with “/var/lib/dhcp3/dhcpd.leases”
and press save.

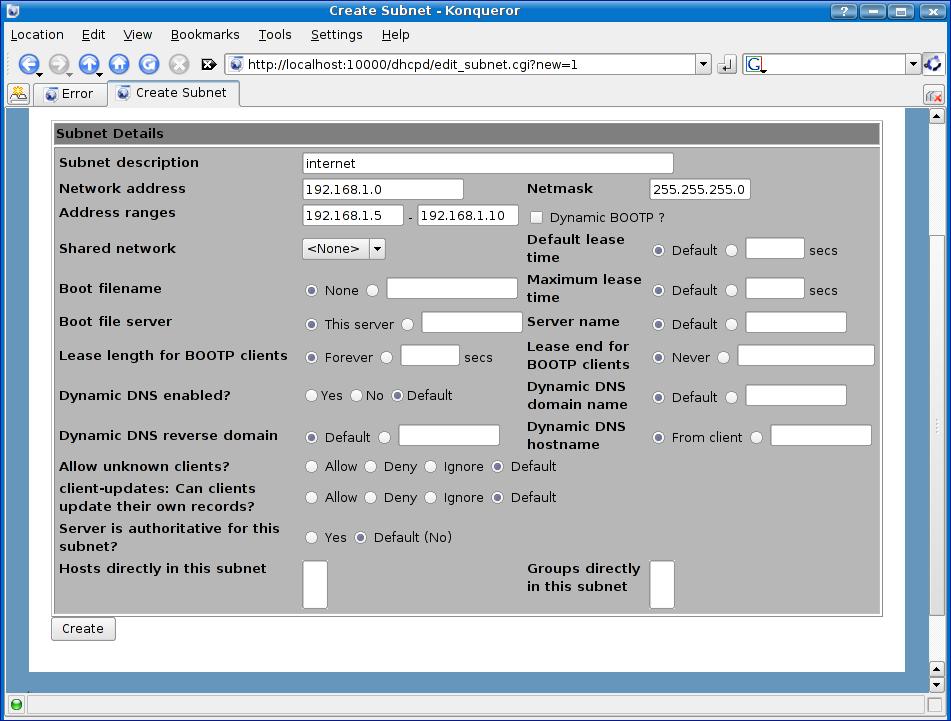
Now press “Add a new subnet” and put a description of this subnet. For network address, make it the same as the internal address but with 0 at the end, for example my internal NIC is 192.168.1.1 so I will put 192.168.1.0 for network address. For address ranges put the range of addrseses for your DHCP server to assign. For netmask put the same as your subnet, most are 255.255.255.0 and press create.

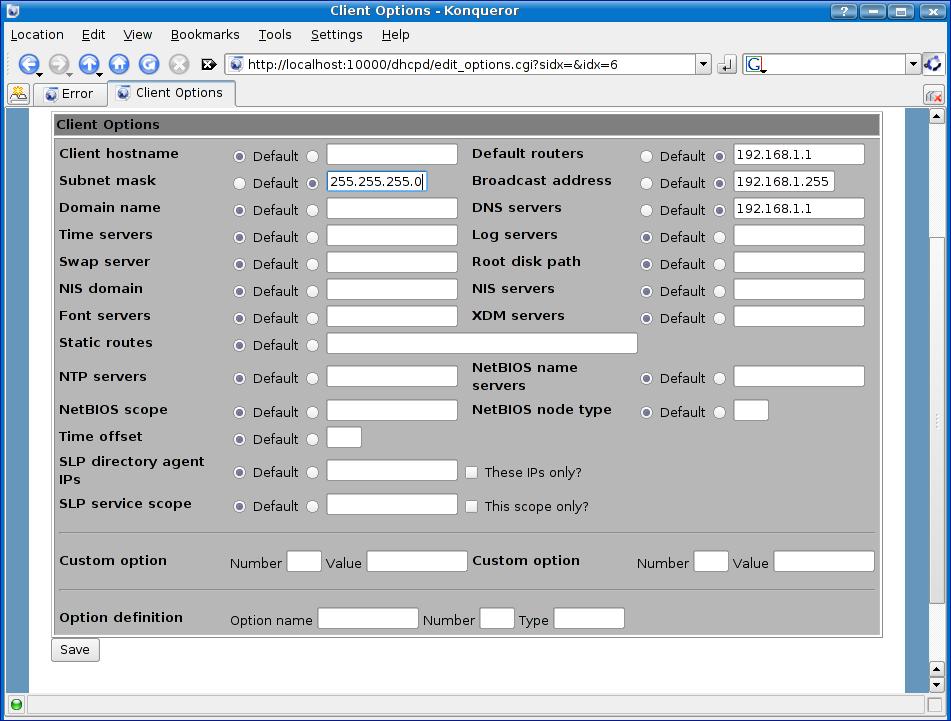
Once created, press the new icon that was just created with the network address you choose under it and scroll down to the bottom and click “Edit Client Options”. Fill in Subnet mask with your subnet, default routers and dns servers with your internal IP and broadcast address with the internal ip but 255 at the end (for example my internal ip is 192.168.1.1 so I will put 192.168.1.255 for broadcast) and press save then press start server.

Your computer will now be a DHCP server, router, and DNS server. To do port forwarding, go to the firewall settings in webmin and go to the Network Address Translation (nat) IPTable. From there you can add rules to Packets before routing (PREROUTING).